Consider your fabric stash. Remember when you first discovered how great sewing and quilting was? Remember how you bought yardage to accommodate all the projects swirling around in your head? Remember the days before fat quarters and charm packs? This is the perfect project to use up those outdated calicos by the ton!
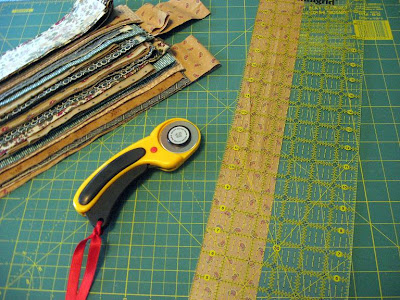
 Cut 2 1/2" wide strips the length of your fabric. Try to use pieces that are at least one yard in length to avoid a lot of seams later. Shuffle and stack your strips to ensure that colors are distributed well. Or pick them out willy-nilly as you sew!
Sew strips together by placing wrong side on top of right side. Set the strips at a right angle to each other and stitch diagonally from corner to corner.

Cut the threads that link your seams and cut off the tops of the corners, leaving a 1/4" seam allowance.
Press diagonal seams open. Press strips into quarter folds to hide raw edges on the inside. This ensures that you won't have fraying strings in your finished rug. However, you may skip this step if you want a more primitive look.
Roll fabric strip into a ball. Crochet to desired size using double crochet on a Q hook. A one yard section equals 2 stitches. Sew additional balls onto your tail in the same fashion as before.
After slicing a full 18 yards of fabric, I have a rug measuring 24" x 44" to put in my back hall. Folding the fabric strips resulted in fairly lofty, structured rug. If strips were not ironed and simply "bunched" while crocheting, I think the rug would compact down on itself more. Unfortunately, my low levels of OCD wouldn't allow me to go down a path that ended in bunching and fraying. But regardless of the strip treatment, after a few days of wet puddle boots and numerous cat naps (literally), this rug should look like a well-loved family heirloom!


No comments:
Post a Comment
Thanks for your thoughts! Come back to visit again soon!