Showing posts with label quilting. Show all posts
Friday, April 1, 2016
My Cheshire Quilt
A few months ago, in an attempt to reduce the Stash and use up terribly out-dated fabric, I pulled together a selection of purples with a larger piece of contrasting aqua. As I was not overly concerned with size, anything from wallhanging to queen-size was fair game, I waited for the fabric speak to me, tell me what era or style to go with. Eventually an idea took shape to do a Gee's Bend inspired quilt by combining wonky squares and stripes until I simply ran out of fabric. To that end, I pieced together this...
Tuesday, March 5, 2013
Big Bad Woolf : an Update
Just wanted to post a quick update on my Big Bad Woolf pillow. I did some simple outline quilting around the entire design and added a yellow, oval button eye. The pillow cover closes with a zipper across the bottom edge. I made my own pillow form using thrifted poly-fill and muslin.
This was a great project. I had forgotten how fun it can be to buy a brand new pattern, cut into my special herringbone wool and have a finished product ready to use just days later! Really, Ladies, try to sew those projects while you're still excited about them. If everything is put off until after you've plowed through the neverending mending pile, the honeymoon might be over. And then your once highly anticipated projects turn into the dreaded UFO!
Tuesday, February 26, 2013
the Big Bad Woolf
I'm so pleased to be able to show you my finished Big Bad Wolf block! This is a paper pieced Block of the Month pattern available from Bungalow Quilting and Yarn Shop. January was Grandmother's cottage, and February was the wolf. Can't wait to see Red Riding Hood who is expected to be strolling through the woods in March! Check out their website to see the same block done up in cotton.
I pieced my block from wool and used 1/2" seam allowances where possible. I also attempted to press the seams open on the back to alleviate bulk. I scaled this block up quite a bit from the original pattern. My finished size measures 18". For those of you not familiar with paper piecing, the block is constructed in sections or quadrants. You literally place your fabric onto the paper template and sew on the pattern lines. The paper is sewn to the fabric and removed later.
Here is the paper pattern for the tree trunk (missing the very top point). The original size is at the far left. I continued to enlarge the pattern on the copier until it was the size I wanted. The pieces of fabric are sewn onto the backside of the paper in the order of the numbers. When each section of the block is completed, they are then sewn together. I apologize that I don't have any 'in progress' photos to show you. This was my first paper piecing project in quite a few years, and I was so thrilled that it was turning out, I just kept pinning and sewing!
My wolf will eventually turn into a couch pillow. He needs beady, yellow button eyes and a bit of outline stitching. Hank suggested I do a barn and sheep block to finish off the matched set, but we'll see. I love sewing with wool, but next on the List is my daughter's Easter dress and jacket.
I pieced my block from wool and used 1/2" seam allowances where possible. I also attempted to press the seams open on the back to alleviate bulk. I scaled this block up quite a bit from the original pattern. My finished size measures 18". For those of you not familiar with paper piecing, the block is constructed in sections or quadrants. You literally place your fabric onto the paper template and sew on the pattern lines. The paper is sewn to the fabric and removed later.
Here is the paper pattern for the tree trunk (missing the very top point). The original size is at the far left. I continued to enlarge the pattern on the copier until it was the size I wanted. The pieces of fabric are sewn onto the backside of the paper in the order of the numbers. When each section of the block is completed, they are then sewn together. I apologize that I don't have any 'in progress' photos to show you. This was my first paper piecing project in quite a few years, and I was so thrilled that it was turning out, I just kept pinning and sewing!
My wolf will eventually turn into a couch pillow. He needs beady, yellow button eyes and a bit of outline stitching. Hank suggested I do a barn and sheep block to finish off the matched set, but we'll see. I love sewing with wool, but next on the List is my daughter's Easter dress and jacket.
Sunday, August 26, 2012
Help Name This Block!
Does anyone know the name of this quilt block?
Several years ago I found an advertisement in one of my mother's Quilter's Newsletter magazines. I don't recall if a product was being sold or an event was being promoted, but along the bottom of the page were a series of different blocks. This was one of them. It's been a long time in the making, maybe going on three years now? You know how it goes; school clothes and Christmas gifts always take precedence.
I drafted up my own dimensions, ending up with a finished 12" square. I liked the Square in a Square design in the center. It's such a classic element. And then I have a pension for Half Square Triangles (so easy and fun to make). Since I'm using the LazyGirl Flying Geese method and my EZ Angle ruler for the half square triangles, it really cuts and assembles pretty quick. Essentially I'm making nine sections and then putting them together. Simple in layout, but it totals up to 49 individual pieces per 12" block, making it look more complicated.
My color choices started in my bedroom. Really. One October morning, facing a day of gardening cleanup, I threw on olive cargo pants and a light blue t-shirt. Guessing I'd still be cold in the Autumn air, I tossed on a rust-red sweater. My reflection in the mirror caught my eye; those three colors - olive, rust and cool blue - made me think. I wore those same clothes for three days straight as I was so enamored with that combination. Going to my fabric stash, I started pulling everything that fit the bill. I added black for accent and decided on the beige and red shirting at the bottom of the above photo. I had two yards of this and knew it would make a great background. The prints span from Civil War reproductions to Thimbleberries to Kansas Troubles to MODA marbles and Floral Fusions to contemporary blenders.
I've always enjoyed cutting fabrics for a new project. Matching up print combinations, stacking piles and knowing you've got one block ready to sew, is so rewarding. I know there are many of you who love your Go! Baby fabric cutters, but I'll stick with my rotary! So I whacked away, using every scrap I could to ensure the most diversity, and started sewing.
I have nine blocks completed and assembled now. This will be the center of my quilt. I'm planning to go lap size for the couch as these colors match the living room very well. Now I need to decide how to border this to make it bigger. I only have a scant one yard of background left. I'm thinking rows of flying geese with a corner stone of some sort followed by two solid (or pieced) borders of varying widths. Really, I have no idea yet.
But I need help naming this quilt. The only thing I've come up with is Bluebirds in the Barnyard (singling out the blue triangles in the corners). Any suggestions from you creative minds out there? Thank you!
Thursday, February 9, 2012
Quilt retreat
In terms of my sewing projects, I hit this month running! Last weekend I met up with dear friends at a retreat hosted by the local quilt shop. It's a glorious four-day weekend of nothing but sewing - and I mean that
literally (well, okay there was a good amount of eating involved and
some sporadic sleeping). We set up our sewing machines and watched the project piles dwindle. All you could hear, over the sounds of raucous laughing, was the *bing* of sewing machines marking the emptiness of yet another bobbin. Really, one of us should have figured the equation [numbers of bobbins used X yards of thread per bobbin = miles sewn]. It would have been astounding.
One of the projects I took along was this table runner made from a line called 'Giddy' by Sandy Gervais for MODA. While I've officially jumped off the charm pack band wagon, this one did have a lot going for it: (1) I'm currently in a pink and aqua phase; (2) it's been clinically proven that cherry prints make me happy; and (3) I stared at it too long while I was waiting for my fabric to be cut. Add that all up and I simply could not resist another charm pack. I passed it very discreetly across the checkout counter.
I made four-patches by sewing a light and dark print together, cutting them apart, shuffling and sewing again. I even took the time to "spin my centers." A nifty little technique that takes the bulk out of the center point where all the squares join. To do this, sew your four squares together as normal. When complete, carefully open the salvage in the center and press all the joining seams in a rotating fashion. Here the seams all spin counter clockwise. You may need to pick out a few stitches in the salvage only to get the seams to lay the right direction.
I was able to finish the top of the runner at the retreat (then I was on to other things!) and did the machine quilting at home. Obviously my '47 Singer does not have a stitch regulator or 'needle down' function, but she's willing to tackle anything. I can drop the dogfeet and with my free motion foot, she's good to go!
This is a photo of the back of the runner. I experimented with a meandering heart-shaped leaf pattern. I've quilted stippling and meandering in so many other projects that I'm ready to try out some simple shapes. It's jerky and awkward in places, but consistently so, so that perhaps you don't notice as much! ;)
I didn't add any borders and bound it with the same fabric as the backing. The pointed ends fit my oval dining room table nicely, and the cheery colors are welcome during these cloudy winter days.
I had a few four-patches leftover, so my friend suggested I make coasters. These quick little dears are simply two blocks, wrong sides together, with a piece of cotton batting (cut slightly smaller) sandwiched between. I stitched an X on each one and pinked the edges. Perfect for ice tea in the summer!
So I can check off the infamous To Do List (you know how I obsess over it!) a February Valentine table runner that will surely perk me up in the mornings. And in case you're wondering, coordinate with most of my summer wardrobe!
One of the projects I took along was this table runner made from a line called 'Giddy' by Sandy Gervais for MODA. While I've officially jumped off the charm pack band wagon, this one did have a lot going for it: (1) I'm currently in a pink and aqua phase; (2) it's been clinically proven that cherry prints make me happy; and (3) I stared at it too long while I was waiting for my fabric to be cut. Add that all up and I simply could not resist another charm pack. I passed it very discreetly across the checkout counter.
I made four-patches by sewing a light and dark print together, cutting them apart, shuffling and sewing again. I even took the time to "spin my centers." A nifty little technique that takes the bulk out of the center point where all the squares join. To do this, sew your four squares together as normal. When complete, carefully open the salvage in the center and press all the joining seams in a rotating fashion. Here the seams all spin counter clockwise. You may need to pick out a few stitches in the salvage only to get the seams to lay the right direction.
I was able to finish the top of the runner at the retreat (then I was on to other things!) and did the machine quilting at home. Obviously my '47 Singer does not have a stitch regulator or 'needle down' function, but she's willing to tackle anything. I can drop the dogfeet and with my free motion foot, she's good to go!
| Click to enlarge |
This is a photo of the back of the runner. I experimented with a meandering heart-shaped leaf pattern. I've quilted stippling and meandering in so many other projects that I'm ready to try out some simple shapes. It's jerky and awkward in places, but consistently so, so that perhaps you don't notice as much! ;)
I didn't add any borders and bound it with the same fabric as the backing. The pointed ends fit my oval dining room table nicely, and the cheery colors are welcome during these cloudy winter days.
I had a few four-patches leftover, so my friend suggested I make coasters. These quick little dears are simply two blocks, wrong sides together, with a piece of cotton batting (cut slightly smaller) sandwiched between. I stitched an X on each one and pinked the edges. Perfect for ice tea in the summer!
So I can check off the infamous To Do List (you know how I obsess over it!) a February Valentine table runner that will surely perk me up in the mornings. And in case you're wondering, coordinate with most of my summer wardrobe!
Monday, January 30, 2012
Stash building
What quilter can resist stash building? Honestly, this is something buried deep in the genetic make-up that cannot be overcome. When I first started quilting, I bought whatever I liked with the dream of one day having enough to make my first quilt. When I finally stopped buying, I had enough to make a queen-sized quilt for my husband and I, a twin-bed quilt for my son, and some scraps leftover for matching pillowcases. At least with quilting, I can satisfy myself with quarter yards (charm packs are useless). But when it comes to dressmaking, I typically go for 2-3 yards depending on how full I want my skirt. Recently I picked up some new fabric at Nancy's Notions. You simply cannot get out of that store without a purchase!
I have some reproduction cottons that have this Victorian, turn-of-the-century feel. I think I will mix them with my small sampling of velvets and silks and work up a crazy quilt arrangement. Still in the planning stages...
...well, that can be said for most of the projects in my cupboard. I tend to buy the fabric, wash it, fold it and tuck it away with vague notions of what it will one day become. And as long as there is room in the cupboard, I let go of the guilt!
In the clearance bin was this 2/3 yard of Christmas fabric. I'm thinking table runner or wall hanging.
Also on clearance was this 1950s novelty. It's a healthy chunk at almost 2 yards, but I'm pretty sure this will become an apron. I just can't see wearing a dress from this.
I splurged and paid full price on 2 yards of this retro print to use as kitchen curtains. I only need three valances. But the more I look at it, I'm starting to contemplate hotpads and mixer covers.
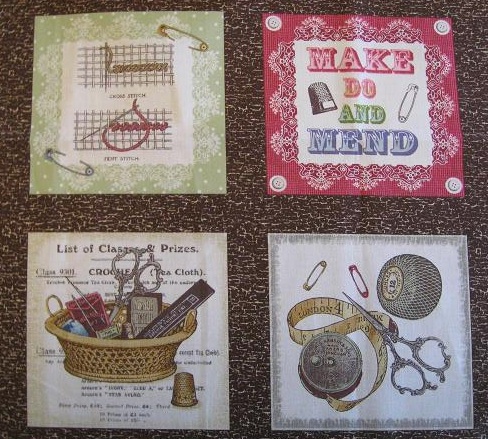
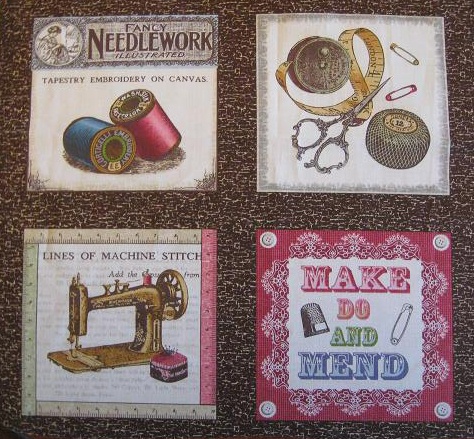
I tend to be a sucker for printed panels and bought these 6" squares of vintage sewing notions. There are three sets of nine different squares. Definitely a wallhanging for the sewing room.
...well, that can be said for most of the projects in my cupboard. I tend to buy the fabric, wash it, fold it and tuck it away with vague notions of what it will one day become. And as long as there is room in the cupboard, I let go of the guilt!
Monday, January 16, 2012
Refurbishing Grandma's quilt
This year for Christmas I refurbished a quilt for my sister-in-law. It was made by her grandmother back in the 1960s and was on her bed throughout her entire childhood. It showed. One look at the dinner plate-sized holes spewing wool batting and the split seams, and you knew it was time to make the hard decision; dog bed or major overall? Over the past few years, I've saved two quilts from going the dog bed route. And one wool quilt I actually took back from the dog and refurbished. Two other quilts I reduced into throw pillows and doll blankets. I'm just a sucker when it comes to things like this. Grandma spent too many hours sewing; the quilt spent too many hours keeping my sister-in-law warm; it deserved to live on in one way or another.
Subscribe to:
Posts (Atom)